It's well and truly cooled down in the Southern Hemisphere which naturally has us thinking of...coats!
Here at Sew Your Way, we're loving the insta-trend of turning a cheerful wool blanket from the op shop or Granny's linen press into a snuggly jacket. What an amazing way to get a HEAP of fabric (natural fibres no less!) for cheap and achieve the life goal of living the cute, cottagecore dream.
The Fabric
I’ve been collecting these retro woollen blankets for years. The brightly coloured checks and satin binding catches my eye from the other side of the thrift store every time. I’ve even been known to fish them out of the “dog bedding” basket! Facebook Marketplace is also a goldmine of vintage blankets and after a little hunt about, I’m confident you will be able to source one in any colour way you desire. The lovely thing about intentionally sourcing damaged blankets for sewing, means you are able to cut around any holes or marks – not only giving a blanket a second life (saving it from landfill) but it's also the chance to save some coin!
Inspiration
![]()
![]()
If you’ve been on #sewtok at all recently, you too probably have inspiration folders full of other maker’s upcycled blanket coat projects. The team at Sew Your Way were particularly excited to see Aussie fashion label, Romance Was Born, featuring patched-together blanket coats as a part of their RWB Forever project. Like us, they’re enthused about closing the loop on fashion waste and make every coat by hand in super small runs. We love this spotlight on less waste and normalising upcycling in the fashion industry. Judging by various #blanketcoat and #blanketjacket hashtags on instagram, we’re not the only ones!
The Pattern

Storytime: I bought a light weight spring weight jacket from Cos last year and have worn it constantly since (cost per wear, what?!). I adore the cropped style. I don’t mind investing in RTW when I know its a piece that fits into my existing wardrobe and get heaps of wear...and I have been known to go to the shops, try things on and get some sewing ideas too. This much-loved jacket was a great jumping off point for finding the perfect pattern for a cosy blanket upcycle of my own. After searching around my favourite Indie pattern makers, I found the LA Veste by Atelier Brunette.
Chore Jacket/Shacket Pattern Ideas
Ilford Jacket by Friday Pattern Co.
Sonny Jacket by Tilly and the Buttons
LA Veste by Atelier Brunette – My final choice
I love how the yoke pattern piece is separate, just like my Cos jacket. The added bonus of this yoke piece is how the shoulder piece wrap around the neck on the bias, meaning the check pattern lands on the diagonal. It's such a cool little design feature, I decided to repeat it by cutting the pockets at a 45 degree angle too.
Putting it All Together

I knew I wanted to use a different, less bulky fabric for the lining pieces as I already was feeling nervous about my home sewing machine getting through the chunky woollen seams. Although it made sense to do something subtle and matching for the lining, I couldn’t resist the chance to contrast for a fun ‘lil surprise…a 1970s thrifted tablecloth was just the ticket!
As with any secondhand materials, I enjoyed the puzzle of cutting pattern pieces around some small holes and marks. I took the time to line parts of this pattern up specifically - like a little flower pop on the inside collar.

After considering my vast “found” bias binding collection (I think most of this came from a shoebox full of bias I bought 10 years ago in a dusty op shop for $2!), I also decided to be a little extra and bind the inside seams with strips of the tablecloth instead.

Overall, I adore the earthy browns and mustard of the tablecloth emphasising the retro 70s vibes of the entire piece.
The Process

Everything was going swimmingly (as I expect it to do so, first time, every time!) until I got to attaching the collar. I don’t think it helped, being my first proper collar and the pattern being translated from French. Absolutely no shade to Atelier Brunette but I feel it may have been easier to have the English translation as stand-alone PDF instructions rather interspersed throughout. I read things once, twice and a third time and sewed and unpicked the collar as many!
After some extensive sighing and muttering, I came to this: What would any hobby be if we weren’t constantly learning and being humbled? A very dull thing to do, indeed. I got the pesky collar on finally and fixed the janky bits with a bit of hand sewing.
I would have been lost without my Sew Your Way magnetic pin dish! With all that pinning and unpinning, I loved having everything close at hand. Did you know you can also use the pin dish as a weight? I liked using steam to press my seams and the pin dish to weigh everything down as it cooled.

The final step is finding the perfect buttons from my late Nan’s stash. I quickly settled on these mellow yellows. The mustard ties in with both the colours from the tablecloth lining and the butter tones in the blanket outer.
I said on TikTok not to ask me about the buttonholes, but we’re all friends here in the Sewing Room aren’t we? Deep breath, making the buttonholes sucked and I made a complete dog’s breakfast of them! The buttonhole foot was chucked into the naughty corner and I just sewed a tight zigzag in rough buttonhole shapes before opening them up.

Going from a groaning, “I’ve ruined everything” (dramatic much?!) to relief as the wool fluffed up and hid the mess...everything's fine! It looks excellent!
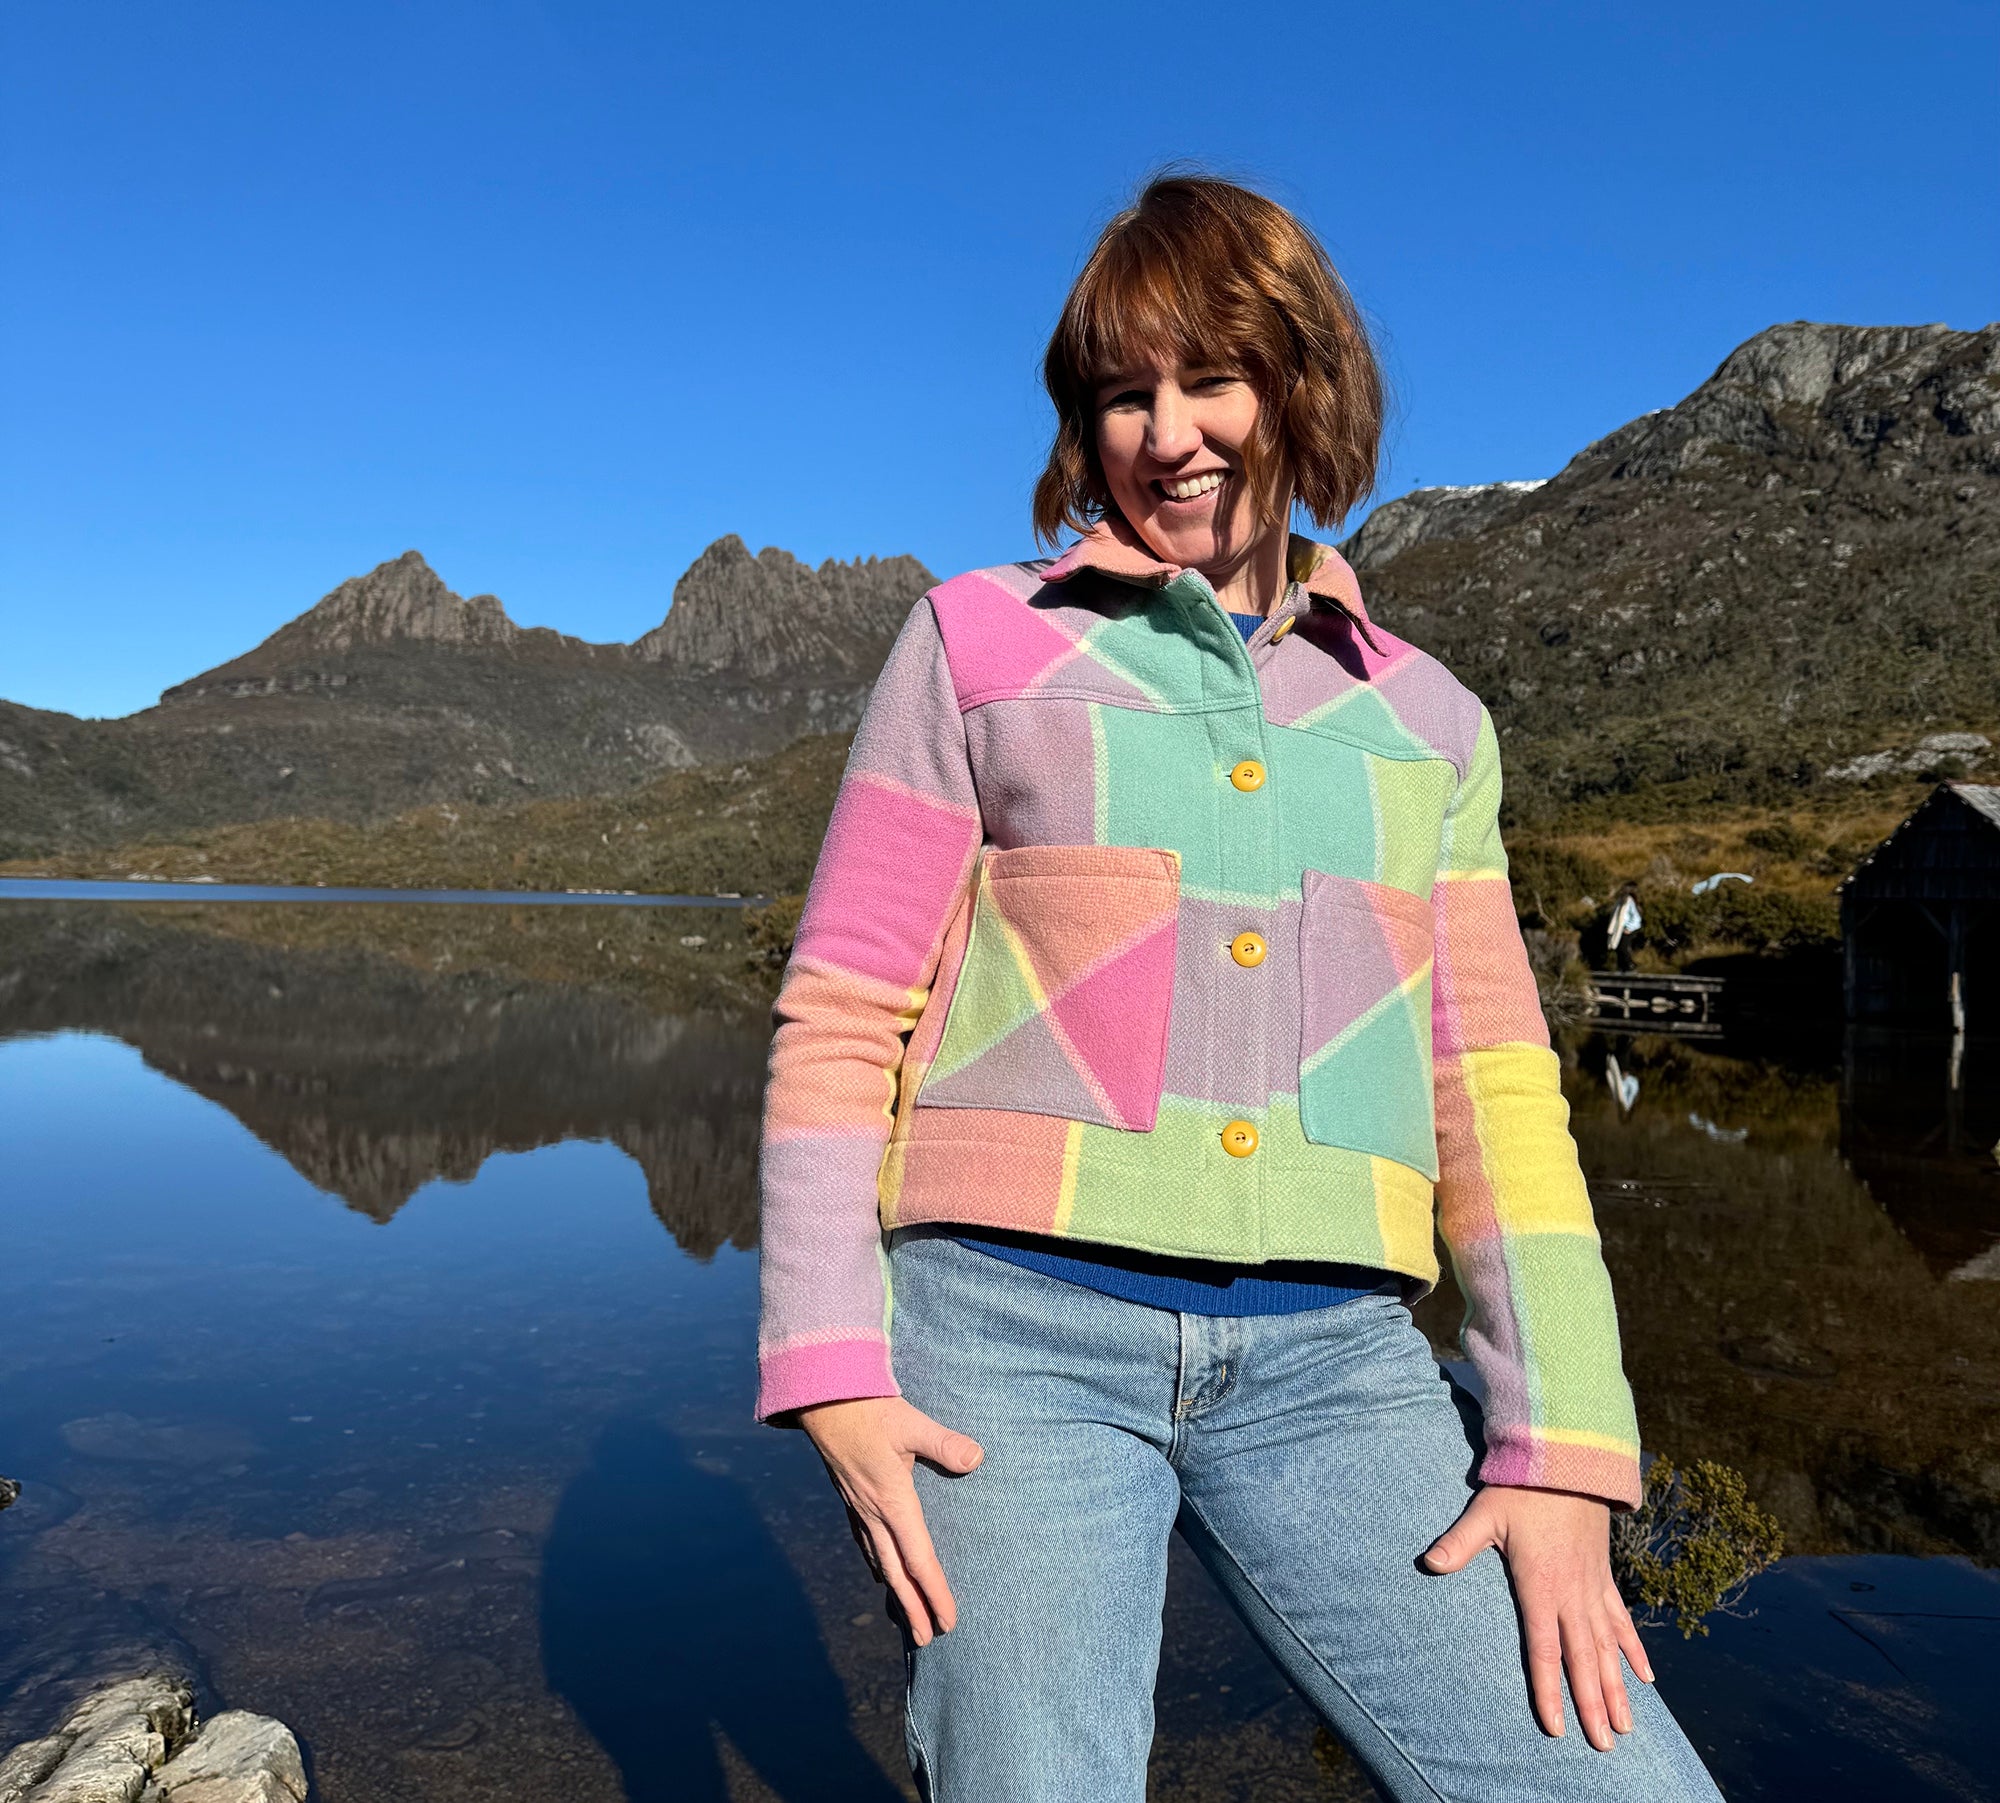
Tah-Dah! The Finished Project

I am in love with the finished product! This upcycled vintage wool blanket coat is not only incredibly cute but comfy and toasty warm! We gave it a true test in the mountains of Tasmania on a recent trip and this jacket loved it’s jaunt to the snow!
Have you endeavoured to make a blanket jacket? We'd love to hear how you faired, so feel free to tell us your experience in the comments.
Until our next sewing adventure, happy sewing!
The Sew Your Way team xox
Comment (1)
I worked at a private boys boarding school in the mid 90’s and we were swapping the old blankets and bedspreads for doonas. I made a coat out of one, before we donated the rest of them to the Salvos. I lined it with flannelette and it was the cosiest jack I ever owned.